


This is our very first article where we take you step by step with an example of animated Material User Interface created with Bunifu UI Winforms. You will need it to use some of the controls and components mentioned.
Let’s dive into it!
First of all, please create a new Windows Forms Application and add a Bunifu Ellipse on the main form. It will look simple, without borders.
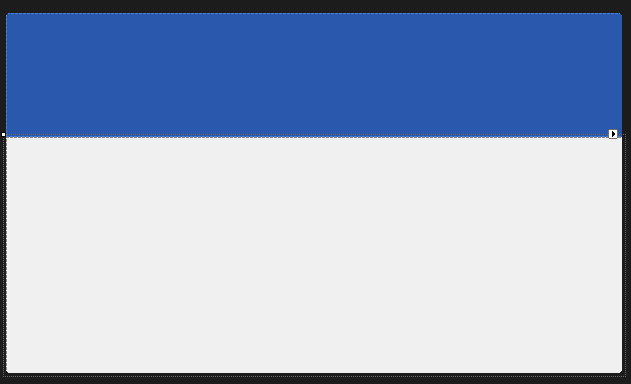
Now please add 2 panels on the form, the first one with dock to the top and the second one with dock to fill. Set the BackColor of the first panel (the top one) to 42, 88, 173 and you should get the following effect:
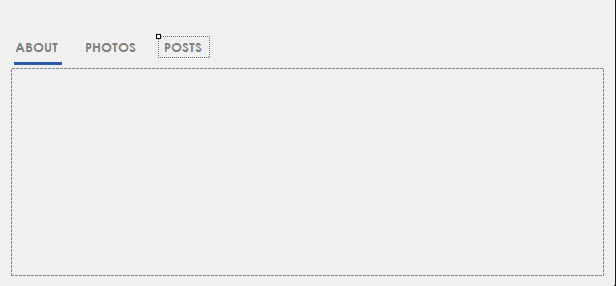
Now we’ll work on the panel on the bottom (the second one). First let’s add another panel inside this one and then above that new panel let’s add 3 labels named About, Photos and Posts (with the font Century Gothic) and above the first one let’s add a Bunifu Separator colored Blue with a Thickness of 3.
This should be the effect:
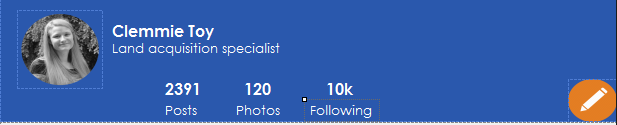
Now we move in the panel on the top, where we’ll add 2 picture boxes to maintain the profile picture and the edit picture. Also we’ll add some labels with the name, position and different statistics. This is an example of designing:
Now we’ll do something very interesting: we’ll make the form move when we drag the panel above (this one that contains the profile picture).
In order to do that, make sure that the name of your panel is Panel1 and type that code in the Form1 class:
[code lang=”csharp”]
Bunifu.Framework.UI.Drag drag = new Bunifu.Framework.UI.Drag();
public Form1()
{
InitializeComponent();
}
private void panel1_MouseDown(object sender, MouseEventArgs e)
{
drag.Grab(this);
}
private void panel1_MouseUp(object sender, MouseEventArgs e)
{
drag.Release();
}
private void panel1_MouseMove(object sender, MouseEventArgs e)
{
drag.MoveObject();
}
[/code]
Now you can easily move your entire form by just dragging the top panel!
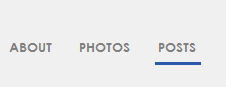
Let’s move now the separator (that blue line below the About label) to each label, when we click on it.
We just need to implement the Click event on each label:
[code lang=”csharp”]
private void label1_Click(object sender, EventArgs e)
{
bunifuSeparator1.Width = label1.Width;
bunifuSeparator1.Left = label1.Left;
}
private void label3_Click(object sender, EventArgs e)
{
bunifuSeparator1.Width = label3.Width;
bunifuSeparator1.Left = label3.Left;
}
private void label2_Click(object sender, EventArgs e)
{
bunifuSeparator1.Width = label2.Width;
bunifuSeparator1.Left = label2.Left;
}
[/code]
You can simply test it and see it working:
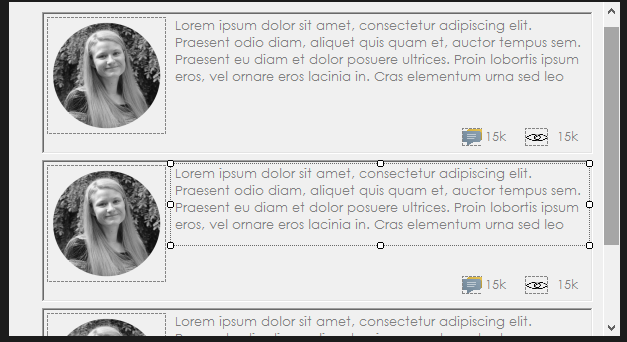
Now we’ll complete each tab. We’ll create each tab as a new User Control component. So let’s work on the “About” tab. Add a new User Control and name it About. Then, place some labels and some pictures in it to fit the following layout:
This is a new user control (defined by you) so you can simply find it in the toolbox and you can basically drop it to the form (as you do with all the other controls).
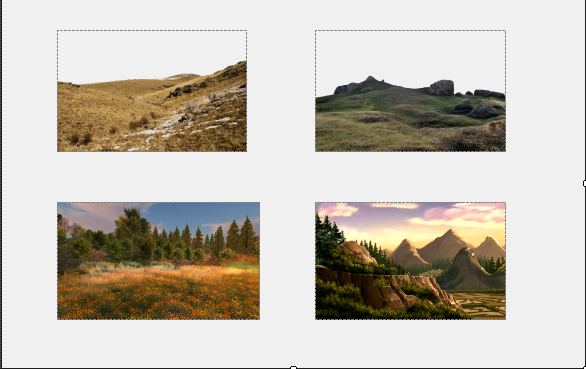
Now let’s add the Photos User Control:
In order to animate the transition between the newly created controls (About, Photos, etc.), let’s add a Bunifu Transition Component and set it’s animation type to HorizSlide. Then add this code in the label1_click method:
[code lang=”csharp”]
about1.Visible = false;
about1.BringToFront();
bunifuTransition1.ShowSync(about1);
[/code]
You need to add a similar structure in the same label_click method that we implement. This way when we click on “Photos” we’ll get a horizontal transition of all the controls of the previous control.
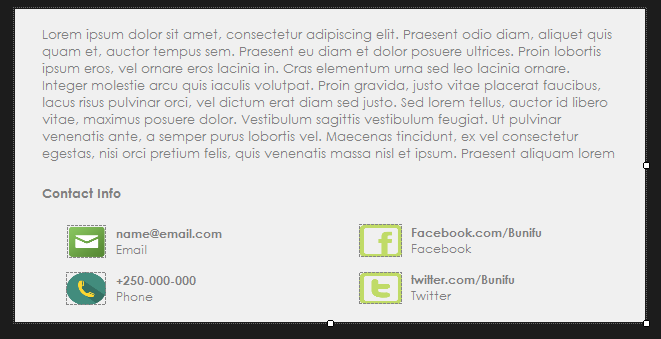
The last control, Posts, can be easily done by adding another panel inside our user control and designing it like that (as an example):
It’s just a simple styling of labels and finding the right image. Just rebuild the solution and you’ll find the control in the toolbox. Add it on the form, complete the label3_click method to use the animation (as I mentioned above) and that’s it.
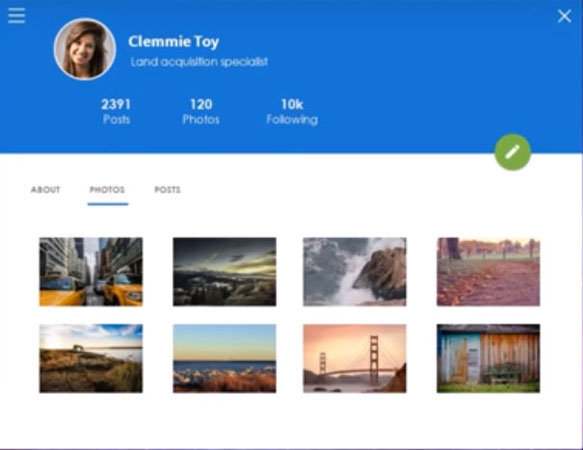
Finally, we created an amazing User Interface that we can use to interact with our backend. We can see again how much we can get from Bunifu UI Winforms.
You can watch a detailed video of the same below.
Please let us know in the comments what you think…More posts coming, stay tuned 🙂
Enjoy!

Leave A Comment